Showing posts with label sewing. Show all posts

Tuesday, June 7, 2011

I Craft Out of Necessity

My husband rides his bicycle into work each morning.  Wait, let me go back and reword that.  My husband USED to ride his bicycle into work each morning.  He USED to park in a free parking lot about a mile from his downtown office building.  He USED to ride a paved trail that lead him right to his workplace.  He USED to save our family $80 a month by doing this.  Enter: Winter Weather and Spring (and Summer) rains.  Now, he’s not so much riding his bicycle as he is taking it in the back of his truck every morning and parking in the garage by his office building. 

Now that summer is here, he’s trying to get himself back into the habit of riding in again.  Though I love that riding in to work saves us money, I don’t so much love the grease-stained pant legs that have become a part of every pair of pants the man owns.  I should have come up with this craft last year.

I decided it was time to make him some pant cuffs to wrap around his pant legs that will keep them from flapping into the bike chain.  I looked through my stash of fabric, found the ‘manliest’ color I could find, and bought some Velcro.  Except for the one Velcro tab I had to remove after stitching on the wrong side of the cuff, it was a very easy and quick project.  If I can do it, anyone can!

Here’s the stuff I used.  Light blue isn’t all that manly perhaps, but it does match all his blue shirts he wears to the office. 

P6040003

Cut two strips of fabric oh, about 4 inches wide. I didn’t really measure much of anything, but I did have him wrap my fabric around his leg initially so knew at least how long it had to be.  I think it was around 12.5 inches or so that he needed around his leg, so I cut them about 16 inches long.  You can never go back if it’s too short!

P6040004

Iron and sew them into two strips that look like this.  No biggie.  I did two rows of straight stitches to make them more secure.

P6040005

Then, sew Velcro along the ends.  But not like this picture shows.  Put the Velcro tabs on opposite sides! Can you believe this is the second one I did?  I did the first one perfectly, then I got careless.  I had to rip out the stitches from the second cuff I did.  Ripping stitches is not fun.  Don’t be like me.

P6040008

WHALAA!  A bike-pant-leg-cuff thingy!  P6040007

Now, if you REALLY want to be like me, have the wearer try it on and realize you made it WAY too long.  Then go back and cut out the middle and sew the two pieces back together for a shorter cuff.   

P6040010P6040011P6040012

I made two, but Rick tells me he only needs one.  That’s fine.  Now I have an extra in case he forgets or looses the first.  I hope this helps with the stains.  Though, I’m not sure I’ll see the benefits until we buy new pants.

P6040006

Friday, February 11, 2011

Sewing Machine Cover

I made something again!

You’re going to think I should change this blog to something crafty, but really, these are all Growth Chart Moments in my life.  I’ve never been friends with a sewing machine.  I’ve always wanted to be crafty but have never found anything that I was good at.  I’m not saying I’m all that good at sewing, but at least I’m really enjoying what I’m making.  I can’t describe the sense of pride I feel when I’ve completed something that resembles what it’s supposed to be and is functional.  It brings a big goofy grin to my face!

Anyway, on with the latest project.

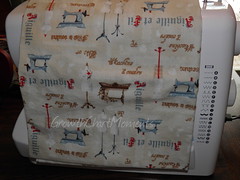
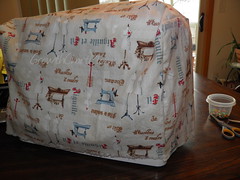
The other day I was at JoAnn’s with my friend.    A few seconds after I fell in love with the cutest little boy fabric ever, I fell in love with the cutest antique sewing machine fabric ever.  I’ve had “make a sewing machine cover” on  my to-do list since I bought the thing last summer, but I had yet to actually make anything.

Until now when I was inspired by the cutest sewing machine fabric ever!

P2070003

I think my friend sent me a link to this tutorial when I first bought the machine, so I knew this was what I would do with the fabric whenever I found it. 

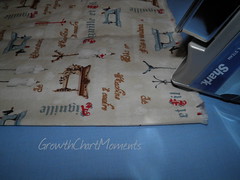
P2070005

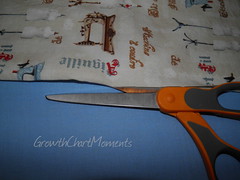
This isn’t a tutorial, just a chance for you to see the way I work. I have decided that to cut my fabric correctly, I need to iron where it needs cut, then take the scissors to the fold line and cut away.

P2070006

That’s not very professional, is it?  I have a roller cutter thing, and I have a very short cutting mat, but I seem to like this method better. Is that strange?  I really have no idea how most people cut fabric. 

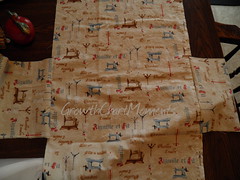
P2070007

After I figured out which way to sew the sides on to the main portion of the fabric, I realized I should have pinned the entire thing together instead of just a few parts at a time.  It may have made my seams a little neater.  Maybe not.

P2070009 

You know how I mentioned in my last post that I find it’s better to over-buy fabric than to under-buy?  Well, I evidently didn’t heed that advice this time, since I didn’t have enough fabric at the bottom to hem.  It’s all raw edges at the bottom.  I’m used to these imperfections of my work.  It gives them character. And I’m easy to please.  I now have a cute cover for my sewing machine!

Thursday, February 10, 2011

Jack’s Pillowcase

I made a pillowcase.  Is that not the most impressive thing ever?  No?

P2050096

Well, you don’t know me very well then.  That’s okay.  Most people probably think making a pillowcase is the easiest thing in the world to do.  They’d be right, you know.

The short story is that I was at JoAnn’s with a friend the other day and saw this adorable fabric.  Jack loved it immediately and wouldn’t let me put it down.  So I bought some thinking I could certainly make a pillowcase with it.

The long story is that I have no idea how much fabric is needed to make a pillowcase.  So, I called another friend and asked her how much yardage I would need to make a pillowcase.  She was a genius and said to go find a pattern, read it and buy that much.  So I bought WAY too much fabric (because in my opinion it’s important to overbuy than under-buy fabric when you’re as clueless as I am at sewing) and found some matching colors for a border.

P2050097

When I got home, and a few days later when I had the time, I sat down at the computer to find a pattern or video that would help me sew a pillowcase.  I knew it couldn’t be that hard, but I really had no idea how to start.

I found this video and this video on Youtube (which really say the exact same thing, but it helps to have two different perspectives when doing a project, right?) and was able to knock out an adorable pillowcase in just a half an hour.

P2050099

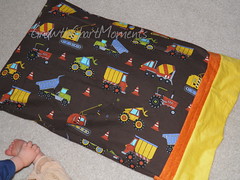
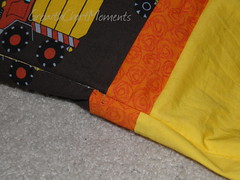
As with any of my projects, you don’t want to get too close.  You will see just how bad it really is.  From afar, it looks adorable and pretty impressive.  Up close, you can see that it is uneven and has edges showing when it’s not supposed to (I did something called a French seam which is supposed to hide all the edges) Jack really doesn’t care about the uneven border or the frayed edges showing.  He’s excited to name all the trucks, diggers and cranes on his very own pillowcase.

Friday, January 7, 2011

More Aprons!

Remember the apron I learned how to make?  I made these aprons for my friends shortly after learning how to do them.  It’s my ‘impressive’ sewing talent these days.

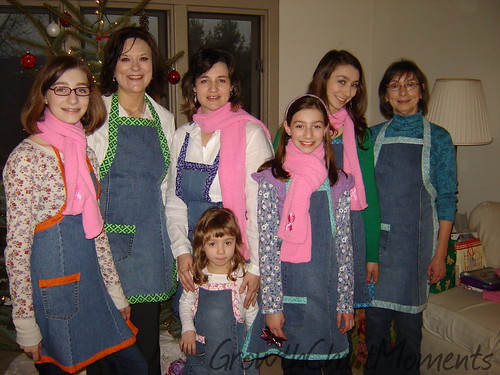
For Christmas I decided that all the women in my family needed to have an apron.   I spent many nights up past midnight working up to the last minute getting 7 aprons done by Christmas for my family.  It took an entire season of Project Runway (for inspiration) streaming through Hulu, a Rachel Ray talk show, and and episode of Modern Family (both watched while I was ironing  50+ strips of fabric). 

DSC06723

I was so happy at how they turned out. Each of the colors matched their personalities or kitchen or was their favorite color.   They all seemed to like them very much.  We may even plan a cooking day this spring or summer to get all the ladies together and put our aprons to good use. 

I  learned a lot after finishing 7 aprons. 

1. Don’t put off till later what you can do in small batches now!  It really did take an entire season of Project Runway to finish these.  I bet I could have done one a night on 7 different nights if I had started earlier than the week before Christmas.  As it was, I made them all in about 3 days.

2. Use the top of the pant leg as the top of the apron.  The thigh is wider on most pants than the ankle.  I think some of them ended up too skinny on the top.

3.  Use bigger sized jeans than what you think the apron wearer wears.  It’s nicer to have a bigger apron covering your clothes, so I’ll go with bigger sizes next time.  Because all of my nieces are super skinny, it worked out okay this time.

4.  Use a smaller neck strap than I think I should use.  Every single one of them had to tie a knot in the back of their neck strap to make the apron fit right. 

5. I still don’t know how to make corners neat.  I’m getting better, but I still don’t know how to polish everything up yet.

If you’re new to sewing and want to try something really fun, start out with this project.  It’s so fun and practical.  I use my apron all the time. 

Monday, July 12, 2010

A Quick Project

I found some flannel fabric at the store this weekend and decided to make some ‘company napkins.’  Our cloth napkins are well used and stained because of it.  We both still love using the cloth napkins, and whatever fabric I used was a great choice.  They mop up spills pretty well and they hold up to many washings and face smears.  (wish I could remember what kind of fabric it is!)

I’ve recently started thinking about having ‘fancy’ cloth napkins for when company comes over.  That doesn’t happen often, but when it does, I’d like to offer them something a little nicer than a spaghetti stained cloth.  I found some beautiful striped flannel and thought I’d use this for my fancy napkins.

DSC04010

Did you know that flannel isn’t very absorbent?  These napkins aren’t going to be the go-to napkins for a drink spill, but they sure do feel nice smooshed on your face!  I picked it purely on what looked nice, not what was practical.  I do that more times than I’d care to admit.

I cut the pieces smaller than I should have, but I didn’t measure anything, so what do you expect?  I sewed two pieces back to back (or front to front to put the seams on the inside), so that both sides would show the pattern.  Although one of them is front to back because of not paying attention and being too rushed to rip the stitches to do it over. 

I’m hoping the stripes hide stains well.  I’m also hoping the colors match every holiday and season.  It has a bit of every color in it.  The girls liked them the other night during our Girls Night, so I s’pose that’s all I can ask for!

 DSC04011

Monday, June 14, 2010

It Was All Going So Smoothly…

I did another sewing project!  This time, my mom had given me some of her old pants that she could no longer fit into (again, we won’t say WHY).  I will make aprons out of a few, but I thought I might try making a pair of cute Capri's with one of them.  As you can see here, my mom is slightly shorter than me…IMG_0048(PS1) copy   and all of her pants are PETITS!

So, I got busy making more fabric strips just like the ones I used for the apron and cutting off the ends of the pant legs.  I attached fabric strips to the pant legs and sewed them on.  Easy!!!  As I was pinning the fabric to the pants, I thought, “This is going too smoothly.”  Then, when I sewed both cuffs without having to rip out any stitches, I thought , “This is going too smoothly!” When I held up the final product, I giggled with delight and thought, “that went so smoothly!!!”

Then I tried them on.

It turns out that even though I tried on one pair of the many jeans she gave me, and they were the same brand, style, and size as the ones I just worked on, they didn’t actually fit the same.  So, now I have a pair of ADROABLE pants that I love but can’t wear.  I was so sad!

So I did what I had to do…I cut up another pair of pants and did the same thing over again with a pair of pants. I made sure to try them on immediately before sewing. 

Of course, the second time around was not as smooth sailing.  I had to re-pin both cuffs, and there were one or two seam ripping moments, but nothing too drastic.

If you are a proficient sewer, you can get this project done in a half hour I bet.  It was super fast, super easy (both times), and super cute!

(I’m not sure why my head is chopped off, but I don’t have the time to tinker with it right now)

I really love them!  I love my fabric (remnant from JoAnn’s), and I love that I have a dozen or so (that may be a slight exaggeration) teal tops that will match the pants perfectly!

Saturday, June 12, 2010

My First Project

I’ve been absent from the blogosphere.  Sorry ‘bout that.  No excuses.  I’m just stating the obvious.

While I was gone, I attempted my first ‘real’ sewing project.  I say “real” because, in my opinion, cloth napkins should be considered practice and not a real project.

I found this project over at A Girl and a Glue Gun.  I’m not sure how I found it, but it looked like it was easy enough for a beginner to try, and I’ve been looking for an easy apron pattern.  Thanks to my friend Beth, I now have an actual pattern for 6 different styles of aprons.  I’ve not attempted those yet.  Baby steps to sewing projects!

Here is my first real project…..

I had some old jeans that I can’t wear anymore.  We won’t discuss WHY I can’t wear them!!  And I picked out some cute fabric from the store.

DSC03851DSC03853

Cut off a pant leg, NOT like this, and then cut it up the middle so you can open it up.

DSC03854DSC03856

Cut a crescent-like shape out of the pants (not sure which end works best here). 

DSC03858 

Now you have something that looks like it could become an apron very easily!

DSC03859

Next, pin the strips of fabric along all the edges, using SAFETY PINS, since you may not own any straight pins. 

 DSC03860   

Spend 2-3 hours sewing, removing stitches, sewing, untangling the bobbin, sewing, removing stitches, and sewing until you the strips of fabric don’t fall off the denim. I watched some Hulu TV while I sewed into the night.

This is what my final product looks like from afar. 

DSC03866

Not bad….

Let’s take a closer look, shall we?

This is what I’m most proud of.  The square 'reinforcements’.  My sewing savvy friend Beth told me about this, and I think it looks great.

DSC03870

At first glance, that pocket looks good.  But at closer inspection, you see that I sewed so far inside the pocket, that the edges all stick up.  I didn’t know if my machine would sew through the edge of the pocket or not.  I didn’t want to mess with the ‘oops, I broke the needle’ scenario at midnight last night.

DSC03867

Now for my edges and corners.  HUH???  How do you finish these things???  This is the part I have to learn about yet.  I’m not sure how to make my edges and corners look finished. 

DSC03872

This was my first one.  Oh, it’s so bad!

DSC03871

I would say, overall this project was fun, and I like the end result.  I have a lot of learning to do, but at least now I know what questions to ask.  I’ll be having sewing parties* at my place this summer – bring your machine and let’s make something!!

DSC03875    

*ok, so I’m not REALLY scheduling any sewing parties, but if you’re close by and like to help struggling beginners learn how to sew, come on over! I’ll provide the entertainment (my 1 year old) and you provide the knowledge.

Saturday, April 17, 2010

Cloth Napkin “Tutorial”

I’m pretty sure I’m the last person on earth that should post a tutorial for sewing anything.   But if you’re a non-sewer like me, who just happened to get a new toy this week, you need something on which to practice your mad sewing skillz! 

So, here we go!

I bought a yard of off-white cotton fabric that felt good to the touch.  I don’t know how absorbent it will be, but it felt like it would make a good napkin.  I’m very scientific about this.

When I got it home, my sister reminded me to wash it before I sew it.  I’m not sure you have to do this for napkins, but I did it anyway. 

Then I cut it. It took me almost an hour to cut one yard of fabric into 9, 12 inch square pieces.  Really.  It took me that long.  DSC03165

I then spent another half hour pressing seams on one napkin.  I even made mitered  the corners.  I followed these directions, but let me tell you, unless you’re making fancy Christmas napkins, don’t bother with all this pressing nonsense.  Really, you’re just going to smoosh them on your face and get them all dirty.  Do they have to be fancy?  I think not.

When you come to your senses, and decide just to sew the edges to prevent falling apart, this project takes no time at all!  And, the best part, is you get to practice your straight lines.  36 times!  You’d think after 36 straight line attempts, I would be great at straight lines.  On the contrary.  I think I got worse as I went along!  And I can’t figure out why the fabric stands still at the beginning of almost every line I do, creating a blob of stitching that messes the whole thing up.

DSC03167

After the seams/edges were done, I popped them back in the washer and dryer to ‘rough up’ the edges.  The edges (I hope) will get all feathery soft and cool looking (in my opinion) after a few washes I’m sure.  They look very rustic. 

DSC03170 

And let me tell you.  If I can do this, you can do this.  Unless you don’t have a sewing machine.  I’m sure it’s physically possible to handsew 9 napkins, but who really wants to?

We’re on our way to a cheaper lifestyle!  I’m not going to have to buy as many paper products now (we’re also using less paper towels and more kitchen towels).  Oh, and we’re probably doing good for the environment too -  Going green, yadda, yadda, yadda.  We’re all about saving money in this family!

Monday, April 12, 2010

My New Toy

Look what I just bought!!  It's an early Mother’s Day gift to myself.  It’s a middle-of-the-road Singer sewing machine.  Not their cheapest, and not their fanciest.  I was surprise to hear that Singer isn’t the same as it used to be .  I thought they were a reliable brand, but it seems that they have gone down in dependability department.  But, it’s what we can afford, so it’s what I got!

  DSC03084

First, let me explain to you how NOT crafty I am.  And, while I’m at it, let me explain how VERY crafty the people around me are. 

Not Crafty Me – I can’t sew, can’t crochet, can’t knit, can’t scrapbook, can’t decorate (rooms or desserts), can’t draw, can’t come up with a creative idea to save my life.

Very Crafty Friends – Can quilt, knit, crochet, spin and dye wool, sew, make jewelry (and that’s all ONE person so far…my SISTER!), decorate, garden, needlepoint, scrapbook, draw…the list is endless really.

In my life I’ve tried to find my ‘thing’.  My sister’s thing was quilting for a long time.  Now it’s making yarn and knitting.  My friend Beth’s thing is crocheting.  She crochets everyone blankets.  One of my favorites to snuggle up in on the sofa is a Beth Blanket.  My Friend Heather *kinda* scrapbooks and paints pottery.  She scrapbooked her two daughters’ first five years.  I have friends who decorate cakes masterfully, bake delicious desserts, and can decorate a room beautifully without batting an eye. 

I have to confess that I sometimes become jealous of these friends and their talents.  Since at least high school age, I have tried to find my niche.  I’ve tried needlepoint, crocheting, quilting, scrapbooking, and baking just to name a few.  I’ve figured out that I’m not a ‘stick-with-it” kind of gal.  I usually start something, find that I’m not great at it (which no one is at first except my sister), and stop trying.  It’s probably saved me a lot of money now that I think of it! I haven’t invested in a lot of supplies for anything, so I don’t have a lot of wasted materials.

You might say that my niche is meal planning and cooking regular meals (dinners only for now) for my family.  But that doesn’t feel very creative to me, so I’m still looking for something else.  I’m still looking for something to spark my creativity –if I have any!

Recently  I’ve been wanting to start sewing.  Nothing major.  Maybe just some cloth napkins, a curtain here or there, and an apron for my friend.  This past Christmas I found three or four ideas for gifts that I wanted to make for my family, but I couldn’t do them without a sewing machine.  I’m excited to see what I can actually create with this new sewing machine.  Maybe this could become a creative outlet for me.  Of course, I need to learn how to sew a straight line first.  That will come with time, right?

LinkWithin

Related Posts Plugin for WordPress, Blogger...